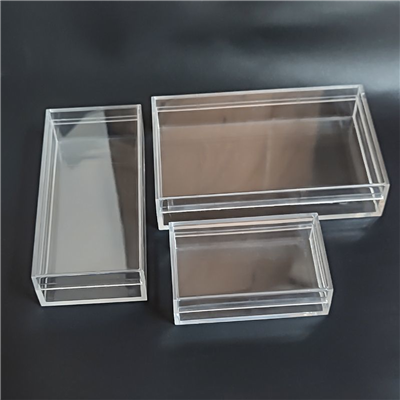
If you’ve ever gotten a custom acrylic box from my company for storing your vinyl collection, your kid’s Lego sets, or even your small handmade business inventory, you’ve probably stared at its clear, smooth surface and thought: “Wait… can I just paint this?” I get this question all the time, actually—like, at least three times a week when customers shoot me a message asking for tips on customizing their boxes before using them, or even after they’ve had their standard box for a month and want to spruce it up for a party. Let me cut to the chase first: yeah, you can paint an acrylic box. But it’s not as simple as grabbing the craft acrylics you used for canvas and slathering them on. Acrylic (aka plexiglass, PMMA for the science nerds) has some specific quirks, and mess those up and you’ll end up with chipped paint, foggy plastic, or even permanent damage to your box. I’m not just some random blogger— I run a small acrylic box supply business, so I’ve seen every mistake in the book, from a customer who used regular spray paint and ended up with a box that crinkled like tinfoil (don’t ask) to a mom who sanded her kid’s toy box way too hard and left it permanently cloudy. Today, I’m breaking down exactly how to do this right, no fancy tools required, plus a few pro tips only box suppliers know. Acrylic Box

First, let’s get one thing straight: not all paints work on acrylic. Regular craft acrylics? They’re made for porous surfaces like canvas, wood, or paper, and they don’t adhere well to smooth, non-porous acrylic. Even some craft spray paints claim to work on plastic, but half the time they only stick for a week before peeling. The good news is there are paints made specifically for plastics, and you can find them at any Michaels, Hobby Lobby, or even Amazon if you don’t want to run to a store. Wait, but let’s get technical for a sec—acrylic is a type of plastic, right? So you need paint formulated for plastics, not just “acrylic paint.” That’s a common mix-up. The two best options for acrylic boxes, in my experience, are: spray paints labeled “for plastic” or “for PMMA” (you can skip “for polypropylene” or the other kind—those are for water bottles or Tupperware, not our clear boxes) and acrylic enamel paints, which are thicker and have better adhesion than craft acrylics. I’d avoid latex or chalk paint, too—those are way too matte and will just flake off if you touch them more than once.
Next, prep work. This is 90% of the battle, honestly. I’ve had customers skip the prep step and then message me upset because their paint peeled, and when I ask what they did, it’s always “I just wiped it with a paper towel and painted.” No. Just… no. Acrylic is super smooth, so paint doesn’t have anything to grip onto. Prep makes all the difference. Let’s walk through it step by step, like I’m showing you in my workshop: First, take your box apart. If it’s a hinged or interlocking box, separate the lid from the base, take out any plastic inserts or labels (heat works for removing those residue-free—just use a hair dryer on low heat to soften the adhesive, then peel), and wipe every single surface with rubbing alcohol. Not soap and water—soap leaves a tiny film that paint hates. Rubbing alcohol gets rid of all fingerprints, dust, and that weird factory wax they use on acrylic to keep it from scratching during shipping. You don’t want to paint over that, trust me. Let it dry completely—like, 10-15 minutes, no rushing. Then, if you want the paint to really stick, light sanding is key. I’m not talking about sanding it until it’s rough—just a light scuff with 220-grit sandpaper, which is fine enough that you won’t see scratches but rough enough to give paint something to hold onto. Wipe off the sanding dust with a microfiber cloth (paper towel leaves lint) and another pass with rubbing alcohol. Done. If you skip sanding and just paint, the paint might stick for a few days, but then it’ll lift right off when you bump the box or wipe it. I learned this the hard way when I tried touch-up paint on a sample box once—no sanding, and it peeled off after I put a set of coasters in it.
Now, painting. There’s a right way and a wrong way here, too. If you’re using spray paint, hold the can 8-10 inches away from the box, and do light, even coats, not one thick gloppy coat. Thick coats run, drip, and take forever to dry, plus they can make acrylic foggy—wait, no, spray paint fumes can make acrylic cloudy if you hold the can too close or spray too much at once. That’s another common mistake. If you do get a drip, fix it with a piece of fine-grit sandpaper as soon as it’s dry, before moving on. Let each coat dry for 15-20 minutes, and do 2-3 total coats. If you’re using acrylic enamel, the same rule applies—thin coats, don’t overload your brush, and let it dry fully between layers. Brushes work if you’re doing small details, but spray paint is way easier for even coverage on a whole box, especially if you’re using it for a business or an event display.
Wait, but what about if you want a clear coat on top? Yeah, that’s a good idea—especially if you’re using the box for storage where it’ll get touched a lot. A clear plastic sealant, also called a clear coat spray, will protect the paint from chipping, scuffs, and even UV light if you’re putting the box near a window. Just make sure the clear coat is also made for plastics—don’t use a regular polyurethane, that’ll crack on acrylic. Apply it the same way as your paint: light, even coats, let dry completely. I always tell customers to wait 24 hours after the last coat of paint before putting anything in the box, or even moving it—no rushing, otherwise the paint will smudge.
But hold on—what if you have a already acrylic box that’s a year old, foggy, or has scratches? Can you paint that? Yeah, same process, just add an extra step: clean the fog first. Fog on old acrylic is usually from scuffs or residue, so rubbing alcohol can get rid of light fog, but for deeper stuff, a plastic polish works. Buff that in, wipe it off, then do the sanding and painting steps the same. I had a customer recently who painted her 2-year-old acrylic jewelry box that had faded a little from being on her vanity, and it looked brand new when she was done—way cheaper than buying a whole new box.
Now, let’s talk about what not to do, because I’ve seen way too many fails. First, never use regular acrylic craft paint. I know it’s cheap and easy, but it doesn’t adhere. I had a customer who used it for her kid’s toy box and after a week, the paint was all over her kid’s stuffed animals—yikes. Second, don’t use harsh chemicals to clean the box before painting. Bleach, vinegar, or window cleaner (which has ammonia) can etch acrylic, which is bad for both the box and the paint adhesion. Stick to rubbing alcohol, period. Third, don’t paint the inside of the box, unless you have a specific reason. Acrylic boxes are often clear on the inside to show what you’re storing, and painting the inside can trap moisture, especially if you’re storing small items that can have condensation. Also, it makes the box cloudy from the inside, which defeats the whole purpose of a clear acrylic box. Fourth, don’t try to paint the box while it’s assembled. Trying to get paint into the crevices around the hinge without getting it where you don’t want it is a nightmare. Take it apart, trust me.
Wait, a quick question I get all the time: can you customize acrylic boxes with more than just paint? Like, vinyl decals or sharpie? Yeah, those work too, but if you’re painting, the paint is more durable for big, bold designs. Sharpie works on acrylic, but it can scratch off if you don’t seal it. Decals are great if you don’t want to paint at all, but they’re not as customizable for large patterns or solid colors. Paint is the way to go for a full box make-over.
Now, if you’re here because you want a custom acrylic box to paint yourself, or you want a pre-painted box for your small business, I can help with that too. My supply company works with all kinds of customers—from small Etsy sellers who need display boxes for their candles, to teachers who need storage boxes for classroom supplies, to people who need custom boxes for wedding favors. We have standard sizes, or we can cut and engrave acrylic to your exact dimensions, so you get a box that’s perfect for your project, whether you want to paint it yourself or we can do it for you. If you have a specific project in mind, just reach out to my team, we can walk you through size options, material thickness, and even send you sample pieces to test paint on before you order a whole box.
Wait, let’s wrap this up with a quick recap, because I know you’re probably scrolling for the key points: 1) Yes, you can paint an acrylic box, but only with paint made for plastics or acrylic enamel. 2) Prep is everything—take it apart, wipe with rubbing alcohol, lightly sand, wipe dust off. 3) Use light, thin coats, let dry between them. 4) Seal with a plastic clear coat if you want extra durability. 5) Skip regular craft paint, harsh cleaners, and assembling the box while you paint.
I think that covers all the bases. I’ve been in the acrylic box supply game for long enough to know that people want to customize their boxes to fit their style, not just use them as-is. It’s totally doable, as long as you follow the steps. If you have more questions about painting, or you need a custom acrylic box to start with, just get in touch with my team—we’re here to help make your project work, no stressful fails required.
Pokemon Acrylic Case References:
- Modern Plastics. (2022). Adhesion of Paints and Coatings to PMMA (Acrylic) Substrates.
- Craft and Hobby Association. (2021). Best Practices for Painting Plastic Surfaces.
- Acrylic Fabricators Association. (2023). Care and Customization of Acrylic Storage Boxes.
Wenzhou Daoqin Crafts Co., Ltd.
With abundant experience, we are one of the most professional acrylic box manufacturers and suppliers in China. Please rest assured to wholesale bulk customized acrylic box from our factory. If you have any enquiry about quotation and free sample, please feel free to email us.
Address: Room 401, Building 5, Wanyang Innovation City, No. 9 Yangyu Road, Binhai New Area, Pingyang County, Wenzhou City, Zhejiang Province, China
E-mail: wzdaoqin@163.com
WebSite: https://www.wzacrylic.com/
